The Low-Light Dilemma: What a “Culture All White Children’s Party” Taught My Junior Photographer About Event Lighting
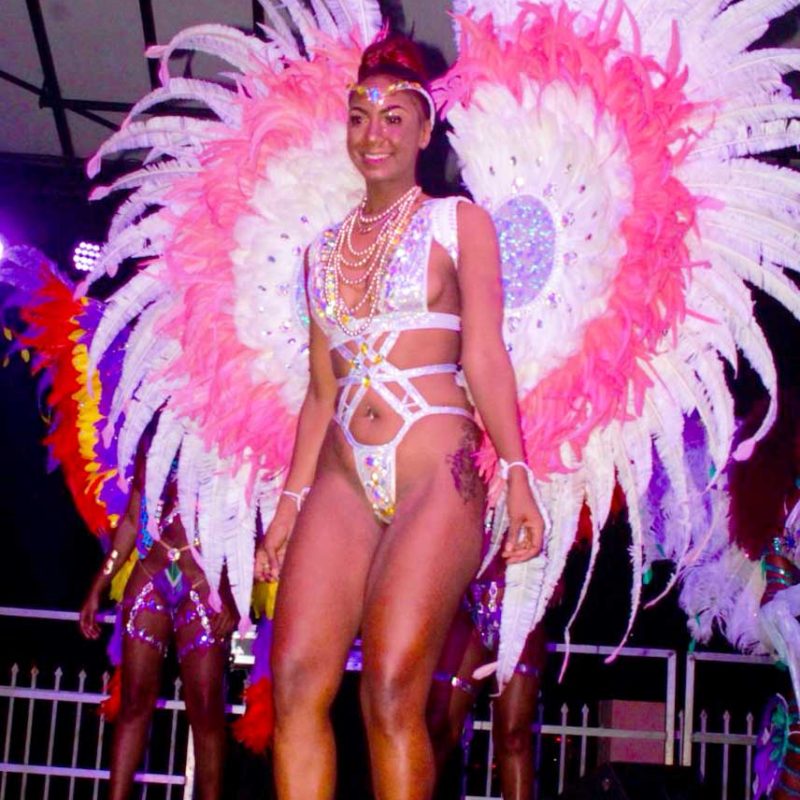
Every photographer remembers those “trial by fire” moments – the gigs that push you to your absolute limits and teach you more than any classroom ever could. For my 14-year-old junior photographer, his second professional event was exactly that. It was a “Culture All White Children’s Party” held on December 13th, and while the atmosphere was vibrant and fun, the lighting conditions presented an Olympic-level challenge for any seasoned pro, let alone a budding talent.
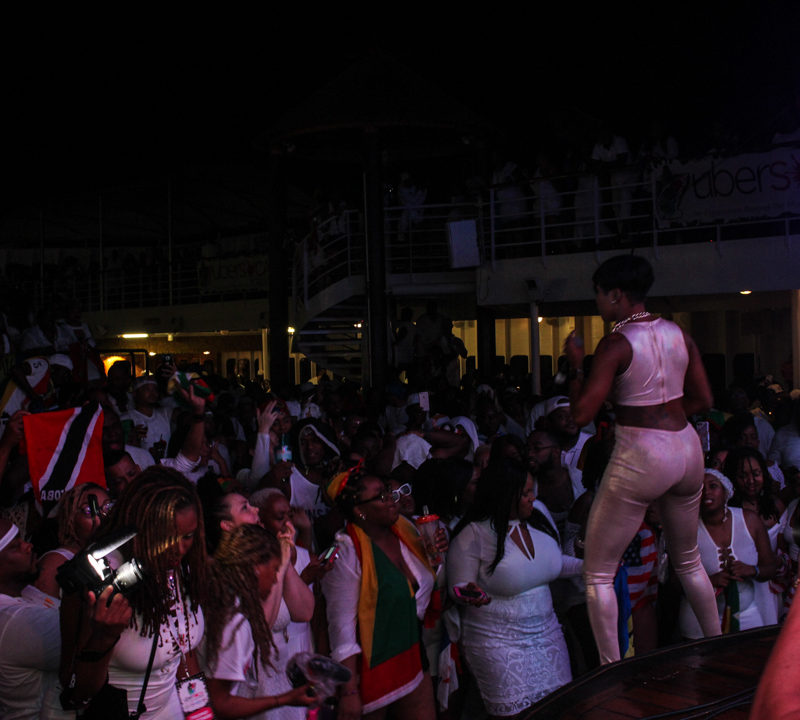
The brief: capture dynamic photos of children and families in a low-light venue, with attendees dressed predominantly in white clothing against darker skin tones, all under the spell of flickering, colored stage lights. Oh, and the final images had to be delivered to the client immediately after the event. No time for extensive post-production magic.
This scenario perfectly illustrates the intricate dance between event design and photographic reality, and why understanding lighting is paramount.

The Designer’s Vision vs. The Camera’s Needs: A Constant Tug-of-War
Event lighting designers are artists. Their goal is to create an immersive experience, to evoke emotion, and to set the perfect mood for the attendees. For our children’s party, the cool blue and purple washes, combined with dynamic, flickering elements, certainly achieved a festive and engaging atmosphere.
However, what looks fantastic to the human eye can be a nightmare for a camera sensor.
High Contrast: Black skin tones against bright white clothing under uneven lighting is incredibly difficult for a camera’s limited dynamic range. It struggles to capture detail in both the brightest whites and the deepest shadows simultaneously.
Colored Washes: While beautiful for ambiance, strong blues, reds, or purples fundamentally alter skin tones. Human faces end up looking alien, and retrieving natural skin color in post-production becomes a monumental, often impossible, task if the light is too saturated.
Low Ambient Light: Dramatic darkness creates intimacy, but forces a camera to boost its ISO sensitivity, introducing unsightly noise or grain into images.
Flickering & Moving Lights: Dynamic strobes and moving head lights create excitement, but they cause wild inconsistencies in exposure and color from one photo to the next. For video, they can cause distracting flicker if the light refresh rate doesn’t match the camera’s frame rate.
Proactive Problem Solving: Communication is Key
For events with challenging lighting, a professional photographer’s first tool isn’t their camera; it’s their voice.
- Talk to the Promoter/Client: Before the event, explain the impact of various lighting choices on photographic quality. Emphasize that for clear, professional images of people, some form of neutral, white light on the main subjects is essential. This doesn’t mean sacrificing mood entirely; colored lights can still illuminate backdrops and ambient spaces.
- Liaise with the Lighting Technician: If a dedicated lighting tech is present, they are your best friend. A simple request for a clean, slightly warm white wash or spotlight on the stage or key interaction areas can make all the difference. Sometimes, a slight tweak on their end solves half your problems.
Embracing (or Avoiding) the Flash
In low-light situations, flash becomes an indispensable tool, but it also comes with its own considerations:
- The “When Allowed” Challenge: Many events, particularly formal or intimate ones, restrict flash photography. Always confirm this with the client beforehand.
- The Right Way to Flash: Simply pointing a flash directly at a subject often results in harsh, unflattering light and kills the ambient mood.
- Slow-Sync Flash (Rear/Second Curtain): This technique is a game-changer. It combines a longer shutter speed (to capture the ambient, colored lights of the venue) with a flash burst (to freeze and properly expose the subject). The result is a sharp subject with a natural-looking, moody background.
- Manual Flash Power & Bouncing: Learning to dial down flash power manually and bounce the flash off a ceiling or wall creates softer, more natural light that blends better with the environment.
The Camera Settings Dance: Precision in a Fast-Paced Environment
Even with communication and flash, camera settings are your direct response to the light. For my junior photographer, this event was a crash course in rapid-fire adjustments.
Here’s a simplified look at the ideal starting point for such conditions:
- File Format: RAW. This is non-negotiable. It preserves the most image data, allowing for significant (though not infinite) recovery of shadows, highlights, and most critically, white balance adjustments in post.
- White Balance (WB): Manual/Custom Kelvin. Auto White Balance simply cannot cope with strong, mixed, or flickering colored lights. Manually setting a neutral WB (e.g., around 5500K) forces the camera to render skin tones more accurately.
- Aperture: As Wide As Possible (e.g., f/1.4 – f/2.8). This lets in the maximum amount of light, keeping your ISO lower. Fast prime lenses (like a 50mm f/1.8) are invaluable here.
- ISO: As Low As Possible (while maintaining shutter speed). Find your camera’s “acceptable” noise ceiling (often ISO 3200-6400 for modern cameras) and try not to exceed it.
- Shutter Speed: Balanace Motion with Light.
- With Flash: Use
1/60s - 1/125s(Slow-Sync) to capture ambient light while the flash freezes the subject. - No Flash: You might need to go as low as
1/30sor even1/15s, accepting some motion blur, especially if subjects are moving.
- With Flash: Use
- Focus Mode: Single Point / Eye-AF. In low light, auto-area focus often struggles. Pinpoint focus ensures your subject is tack sharp.
The Continuous Need to Change Settings: This isn’t a “set it and forget it” scenario. As lights change, as subjects move, as the stage becomes darker or brighter, a photographer must constantly assess and adjust these settings – often within seconds – to get a usable shot. This requires quick thinking and a deep understanding of the exposure triangle.
Time Delays & Sensor Readout: In fast-paced, low-light environments, particularly when shooting video or rapid bursts, the camera’s sensor has to work overtime. This can lead to issues like “rolling shutter” (skewed vertical lines when panning quickly) or slower autofocus performance, adding another layer of complexity.
Setting Client Expectations Based on Lighting Challenges
This is perhaps the most crucial takeaway for any professional, especially when dealing with the kind of immediate delivery required for my junior photographer’s gig.
Before any low-light event, sit down with the client and openly discuss the potential impact of their chosen lighting scheme on the final images/video.
- Show Examples: If possible, show them examples of what happens when a venue is bathed in deep blue light vs. when a clean white light is used.
- Explain the Trade-offs: “With this dramatic blue lighting, we can capture the mood, but skin tones will appear blue. If natural skin tones are a priority, we’ll need to work with the lighting tech for some neutral fill light on faces.”
- Define “Professional Results”: Be clear about what constitutes a “clean, clear image” in challenging conditions. It might mean that some shots will inherently have more noise or a distinct color cast if the lighting cannot be adjusted.
- Manage Deliverables: If the client insists on very specific, challenging lighting, adjust their expectations for the final product. Perhaps fewer “perfect” shots, or a longer post-production timeline to try and mitigate issues (though some things are irreversible).
A Teachable Moment for All
My 14-year-old handled this incredibly demanding situation with grit and determination. He got the job done, delivering images to the client that captured the event’s energy despite the technical hurdles. While the photos certainly provided a springboard for in-depth critiques and learning, they also stand as a testament to his adaptability and quick thinking.
This “Culture All White Children’s Party” wasn’t just a gig; it was an invaluable masterclass in the realities of event photography. It underscored that success in challenging environments isn’t just about owning great gear; it’s about understanding light, mastering your camera, and proactively communicating to ensure both the client’s vision and photographic quality can coexist.
What are your biggest lighting challenges at events? Share your experiences and tips via our Instagram.